Introduction |
I first stumbled upon the idea of combining dill pickles with parmesan for chicken when I was experimenting with new flavor pairings after a long week of endless chicken recipes. The bright tang of pickles cut through the richness of the cheese, creating a bite that was both savory and refreshingly sour. I couldn’t wait to share this translation of a family mystery snack into a full dinner that any seasoned or novice cook will instantly recognize as comfort food with a twist.
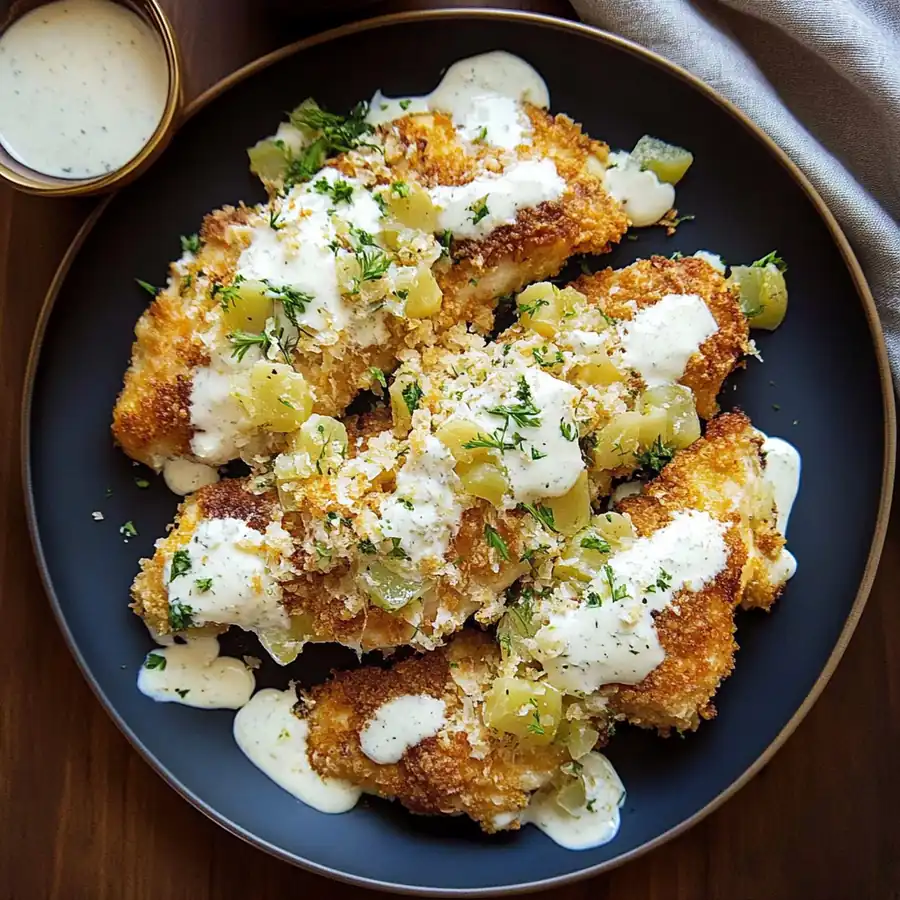
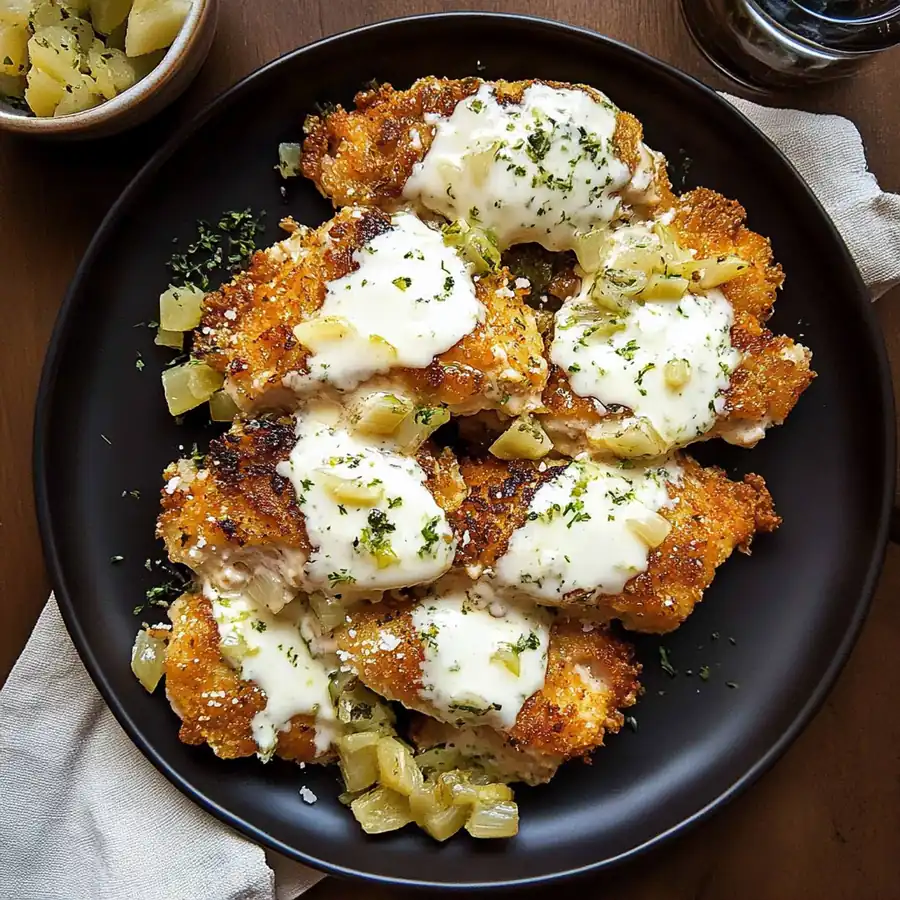
This recipe transforms ordinary chicken breasts into golden, crispy nuggets of bliss. With a light panko crust infused with grated parmesan and a splash of dill pickle juice, the dish offers a savory bite and a subtle peppery note that dances on the palate. The result? A dish that satisfies your cravings for something crunchy yet keeps the dinner healthy and packed with protein.
Whether you are hosting a potluck, looking to spice up your weeknight menu, or simply craving a creative way to use up leftover pickles, this crispy dill pickle parmesan chicken fits the bill perfectly. The fresh dill undertones and parmesan melt together in the oven, leaving you with a satisfying crunch and an unrivaled flavor profile that fry or bake lovers will adore.
- ●●Delightful crisping result that mirrors a classic chicken sandwich.
- ●●Dill pickles’ zing delivers a subtle, unexpected citrusy brightness.
- ●●Parmesan adds a savory depth without being overpowering.
- ●●Simple, pantry-friendly ingredients that require minimal prep.
- ●●Can be baked or fried to accommodate health and convenience choices.
- ●●Quick turn‑around time—ready in less than an hour.
Essential Ingredients |
Chicken Breasts – 1 lb boneless, skinless chicken breasts sliced into bite‑size pieces for even cooking.
Dill Pickle Brine – ½ cup to marinate the chicken, infusing it with a subtle tartness.
Parmesan Cheese – ¾ cup freshly grated for an intense cheesy flavor.
Panko Breadcrumbs – 1 cup to give a light, airy crunch that holds sauce and seasoning.
All‑Purpose Flour – ½ cup to coat the chicken before the breadcrumb layer, creating an extra protective barrier.
Eggs – 2 large, beaten for helping the crumbs adhere to the chicken.
Garlic Powder – 1 tsp for a robust aromatic base.
Onion Powder – 1 tsp for subtle sweetness.
Dill Essence – 1‑2 tsp fresh dill or 1 tsp dried to deepen the pickle flavor.
Seasoning Salt & Black Pepper – pinch each to taste.
Vegetable Oil – 3‑4 Tbsp for frying or drizzling the final product.
 Let’s Make it Together |
- In a shallow dish, whisk together the flour, garlic powder, onion powder, dill essence, salt, and pepper.
- Place the beaten eggs in a second bowl to create a dredging station.
- Coat each chicken piece first in the seasoned flour, tapping off excess, then dip in the egg mixture, and finally roll in the breadcrumb‑cheese blend until thoroughly covered.
- Heat about 2 inches of vegetable oil in a cast‑iron skillet to 350°F (use a candy thermometer for precision).
- Carefully lay the coated chicken in the hot oil, working in batches to avoid overcrowding, and fry for 3‑4 minutes per side or until golden brown and cooked through.
- Transfer the fried chicken to a rack or paper towel‑lined plate. If baking instead, preheat an oven to 425°F, line a sheet with parchment, and bake for 18‑20 minutes, flipping halfway, until the coating turns crispy.
- Serve immediately with a side of ranch, honey mustard, or a light dill yogurt sauce to enjoy the full spectrum of pickle‑parmesan delight.
●When marinating, do not let the chicken sit in pickle brine for more than 30 minutes to avoid over‑softening the texture.
●Using cold oil and a heavy‑bottomed pan reduces the chance of the coating bleeding or sticking during frying.
●Pat the coated chicken dry with paper towels before adding to oil to maintain a steady frying temperature.
●For an extra layer of crunch, double‑coat the chicken: dredge once in flour, then in eggs, back in flour, again in eggs, and finally in breadcrumb mixture.
●Always let the baked chicken rest for 3 minutes after removing from the oven to allow the juices to redistribute.
Perfecting the Cooking Process |
To achieve a golden crust with perfectly cooked meat, keep the oil temperature steady around 350°F. A sudden temperature spike will cause the breading to brown too fast while the interior stays raw.
When baking, pre‑line a sheet with parchment and consider a rack to elevate the chicken. This promotes even heat circulation, ensuring each side crisp up without topping on moisture.
Add Your Touch |
Swap out dill pickles for jalapeño or banana pepper brine for a spicy variation, or stir in a pinch of smoked paprika into the breadcrumb mixture for a smoky undertone.
For a low‑calorie option, use a non‑stick skillet and olive oil spray instead of deep frying, and finish the dish with a sprinkle of fresh chives or parsley for a pop of color.
Storing & Reheating |
Cool the cooked chicken fully, then store in an airtight container in the refrigerator for up to 4 days. Keep the breaded pieces separate from any sauces to preserve crunch.
Reheat in a 375°F oven for 10‑12 minutes, or microwave on high for 1 minute per piece and finish on a hot skillet for 1‑2 minutes to regain crispness.
●Always use fresh, high‑quality parmesan; aged cheese provides depth without an overly sharp bite.
●Weigh the chicken pieces and aim for uniform thickness; uneven pieces cook at different rates leading to uneven crust.
●Brine the chicken prodigiously before coating to lock in moisture and add an inherent tanginess that accentuates the pickles.
●Keep the temperature of the oil constant with a deep‑fry thermometer; flashing the temperature back and forth will ruin the crisp.
●Serve immediately or use a low‑heat grill to slightly char the exterior while retaining the peppery crunch.
FAQ |
- ●Q: Can I meal prep and reheat this chicken?A: Yes, store in a sealed container. Reheat in a 350°F oven or toaster oven for a crispy finish. Avoid microwaving alone as it softens the crust.
- ●Q: Is there a substitute for dill pickle brine?A: A tablespoon of vinegar with a sprinkle of dill works; you may adjust quantity for desired tartness.
- ●Q: How do I keep the coating from sliding off during frying?A: Pat the coated chicken dry, use a double‑coat method, and absence of excess oil keeps the layers intact.
- ●Q: What’s the best oil for frying this dish?A: Peanut or canola oil with high smoke point ensures a clean taste and keeps the flavor profile intact.
- ●Q: Can I use chicken thighs instead of breasts?A: Absolutely! Thighs stay more moisture‑rich; just adjust cooking time by a minute or two.

Crispy Dill Pickle Parmesan Chicken You’ll Love
- Total Time: 35 minutes
- Yield: 4 servings 1x
Description
Crispy dill pickle Parmesan chicken—golden breaded pieces marinated in bright pickle brine, layered in cheese‑panko breadcrumbs and fried or baked till deliciously crunchy.
Ingredients
- 1 lb boneless skinless chicken breasts, sliced
Instructions
- Coat chicken in seasoned flour, dip in eggs, then bread in Parmesan‑panko mix
- Prep Time: 15 minutes
- Cook Time: 20 minutes
- Category: Dinner
- Method: Frying or Baking
- Cuisine: American