
A Patriotic Summer Tradition |
Every year, the pressure to produce a show-stopping dessert for the neighborhood block party reaches a fever pitch, and for a long time, I struggled to find a balance between visual flair and actual taste. I spent hours attempting intricate tiered cakes that melted in the humid July heat, leaving me frustrated and exhausted before the first firework even launched.
I almost gave up on this recipe until I realized that the secret to a stress-free holiday wasn’t more effort, but smarter shortcuts using a stable base. a delicate cake to a dense, chewy cookie bar, I finally created a treat that survives the outdoor picnic table while still looking like a professional centerpiece. Who knew a simple box mix could be the foundation for such a nostalgic, crowd-pleasing victory?
- ●Unbeatable speed since the cake mix handles the leavening and flavor balance.
- ●Extremely stable structure that doesn’t melt or wilt in summer heat.
- ●Vibrant patriotic colors that make them an instant focal point on any dessert table.
- ●A chewy, fudge-like texture that appeals to both children and adults.
- ●Minimal cleanup because everything is baked in a single sheet pan.
Essential Ingredients |
White Cake Mix: I prefer the Betty Crocker brand for its consistent sweetness; omitting this means you’ll have to measure out flour, sugar, and baking powder individually.
Unsalted Butter: High-quality European style butter provides a richer mouthfeel, and skipping it will result in a cakey texture rather than a dense cookie bar.
Eggs: Large grade-A eggs are the gold standard here; without them, the bars will lack the structural integrity needed to hold the heavy candy toppings.
Red and Blue Food Coloring: I only trust gel colors for their intensity; liquid drops often dilute the batter and lead to pastel tones rather than bold patriotic hues.
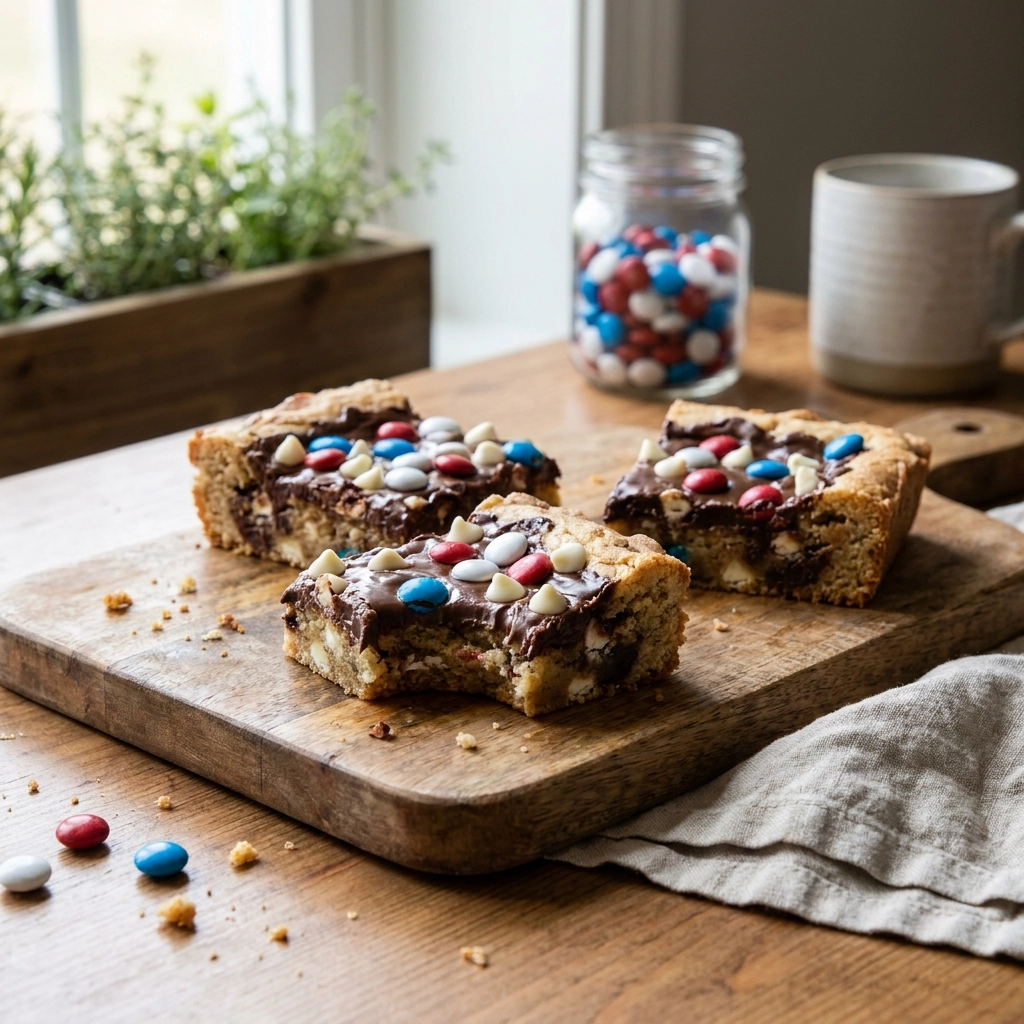
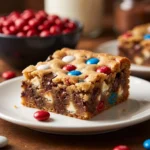
Red, White, and Blue M&Ms: I suggest using the official holiday mix for color accuracy; omitting these removes the crunch and the visual theme of the dessert.
Let’s Make it Together |
- The Prep: Preheat your oven to 350°F and line a 9×13 inch baking pan with parchment paper to ensure a clean release.
- The Base: Cream together the softened butter and eggs in a large bowl until the mixture is smooth and pale.
- The Mix: Stir in the entire box of white cake mix until a thick, sticky dough forms throughout the bowl.
- The Divide: Split the dough into three equal portions across three separate mixing bowls.
- The Color: Fold the red gel coloring into one bowl and the blue gel coloring into another, leaving the third bowl pristine white.
- The Layering: Spread the red, white, and blue doughs side-by-side in the pan, using a spatula to gently swirl them where they meet.
- The Topping: Press the festive M&Ms firmly into the top of the dough before the bars enter the oven.
- The Bake: Bake for 20 to 25 minutes until the edges are golden and a toothpick comes out with a few moist crumbs.
Avoid overmixing the batter after adding the color, as this can lead to a tough, bread-like consistency.
Ensure your butter is truly room temperature to prevent lumps from forming in the cake-mix base.
Do not overbake these bars, or you will lose that signature chewy center that makes them special.
Using a parchment sling allows you to lift the entire block out of the pan for easier cutting.
Check that your oven is fully preheated to ensure the bars rise evenly across the pan.
Perfecting the Cooking Process |
Precision with temperature is the difference between a gooey bar and a dry biscuit. Because cake mix contains a high sugar content, the edges tend to brown faster than the center; I recommend rotating your pan halfway through the baking time to account for any hot spots in your oven.
Timing should be judged than just the clock. When the center has a slight give but the edges are set and pulling away from the sides, it is time to remove them. Have you noticed how a slight under-bake actually creates a better texture once the bars cool completely?
Add Your Touch |
If you are looking to shake things up, try replacing the white cake mix with a lemon mix for a zesty, summer-citrus twist. For a gluten-free adaptation, swap the standard mix for a 1:1 gluten-free white cake mix and add an extra tablespoon of butter to maintain the moisture. Why stick to one flavor when you can customize the base?
To add more depth, fold in white chocolate chips or dried cranberries to the red and blue sections. For a salty-sweet contrast, sprinkle a pinch of flaky sea salt over the top immediately after removing the bars from the oven. You could even swap the M&Ms for fresh blueberries and strawberries for a more natural, fruity aesthetic.
Storing & Reheating |
Store these bars in an airtight container at room temperature for up to four days, though keeping them in the fridge will extend their life to a full week. If you store them in the fridge, the texture becomes denser and almost like a truffle.
To reheat, pop a square into the microwave for about 10 to 15 seconds. This softens the butter and makes the chocolate M&Ms slightly melty, recreating that fresh-from-the-oven experience without heating the entire pan.
1Sift your cake mix if you notice any large clumps to ensure a perfectly smooth batter.
2Use a digital scale to divide the dough for perfectly even red, white, and blue stripes.
3Chill the bars for one hour before slicing to get clean, professional-looking edges.
4Apply a tiny amount of cooking spray to your parchment paper to prevent any sticking.
5Store the bars with pieces of wax paper between layers to prevent the colors from bleeding.
FAQ |
- ●Q: Can I use a different flavor of cake mix?A: Absolutely, although white or yellow cake mix works best for the colors to pop. If you use a chocolate mix, the red and blue dyes will blend with the brown, resulting in a muddy look rather than a vibrant patriotic display.
- ●Q: How do I prevent the colors from bleeding into each other?A: The key is to avoid over-swirling the dough with your spatula. Gently place the colors side-by-side and only move them slightly at the borders; if you stir too much, the colors will merge into a purple or orange blur.
- ●Q: My bars turned out too cakey, what happened?A: This usually happens if you use too many eggs or if the butter wasn’t sufficiently creamed. Ensure you follow the measurements exactly and use a heavy-duty cake mix, as some “light” versions have different ratios that can alter the density.
- ●Q: Can I freeze these bars for later use?A: Yes, these bars freeze beautifully. Wrap individual squares in plastic wrap and place them in a freezer-safe bag for up to three months, thawing them in the refrigerator overnight for the best flavor and texture.
Festive 4th of July Cake-Mix Cookie Bars Recipe
- Total Time: 40 minutes
- Yield: 24 bars 1x
Description
Chewy, colorful cookie bars made from a white cake mix base. Perfect for 4th of July celebrations with a patriotic red, white, and blue appearance.
Ingredients
- 1 box (15.25 oz) White Cake Mix
- 1/2 cup unsalted butter, softened
- 2 large eggs
- Red gel food coloring
- Blue gel food coloring
- 1 cup red, white, and blue M&Ms
Instructions
- Preheat oven to 350°F and line a 9×13 pan with parchment.
- Cream together butter and eggs until smooth.
- Mix in the cake mix until a thick dough forms.
- Divide dough into three equal portions.
- Color one portion red and one portion blue; leave one white.
- Spread dough colors side-by-side in the pan, swirling slightly.
- Top with festive M&Ms.
- Bake for 20-25 minutes until edges are golden.
- Prep Time: 15 minutes
- Cook Time: 25 minutes
- Category: Dessert
- Method: Baking
- Cuisine: American