Imagine a deliciously cheesy taco that’s perfectly baked to crispy perfection, ready to delight your taste buds. Oven-baked cheesy tacos fresh from the oven are not just a meal; they’re an experience that combines flavor, nostalgia, and comfort in every bite.
This recipe is an absolute game-changer for weeknight dinners, gatherings, or simply when you crave something satisfying yet easy to prepare. With the right ingredients and our simple step-by-step instructions, you’ll create a crowd-pleasing dish that shines with cheesy goodness and is bursting with flavor. Let’s dive into why you’ll fall in love with these oven-baked cheesy tacos!
Why You’ll Love This Recipe
First and foremost, oven-baked cheesy tacos are incredibly easy to make. With minimal prep time and simple ingredients, you can whip up this delicious dish even on the busiest of weeknights. The baking process allows for even melting of cheese and crisping of tortillas, giving you that perfect texture that’s hard to resist.
Another reason you’ll adore this recipe is its versatility. You can easily customize the filling to suit your tastes or accommodate dietary restrictions. Whether you prefer seasoned ground beef, shredded chicken, or a vegetarian mix filled with beans and vegetables, these tacos adapt beautifully to your preferences.
Finally, these cheesy tacos make for fantastic leftovers. They reheat well without losing their crunch or flavor, making them ideal for meal prep or late-night snacks. You’ll find yourself looking forward to having a tasty treat waiting for you in the fridge!
Key Ingredients
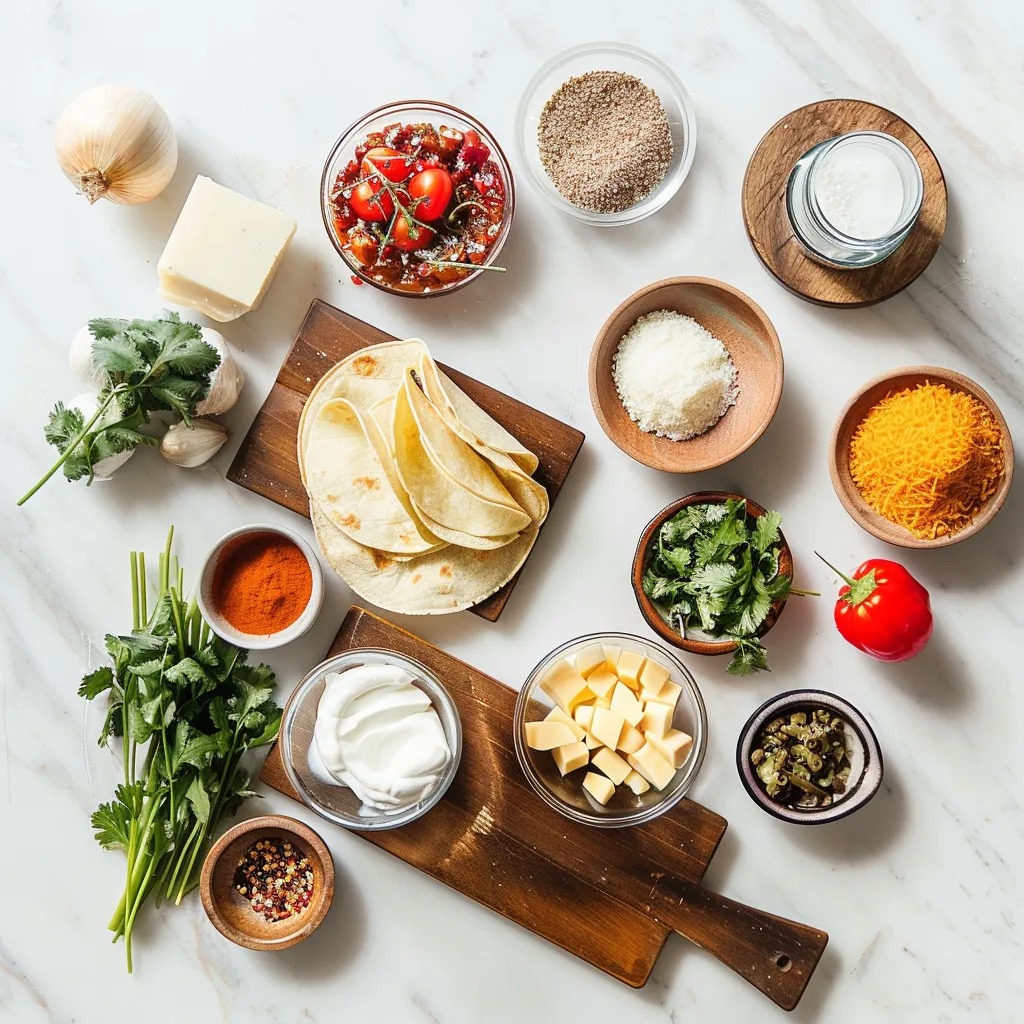
The beauty of oven-baked cheesy tacos lies in their simplicity and the quality of ingredients used. Here’s what you’ll need to create this mouthwatering dish:
- Taco Shells: Choose small corn or flour tortillas that hold up well during baking while adding a delightful crunch.
- Ground Beef or Turkey: A classic filling option seasoned with taco spices adds rich flavor and protein to your dish.
- Taco Seasoning: Use store-bought or homemade seasoning blends for that authentic taco taste.
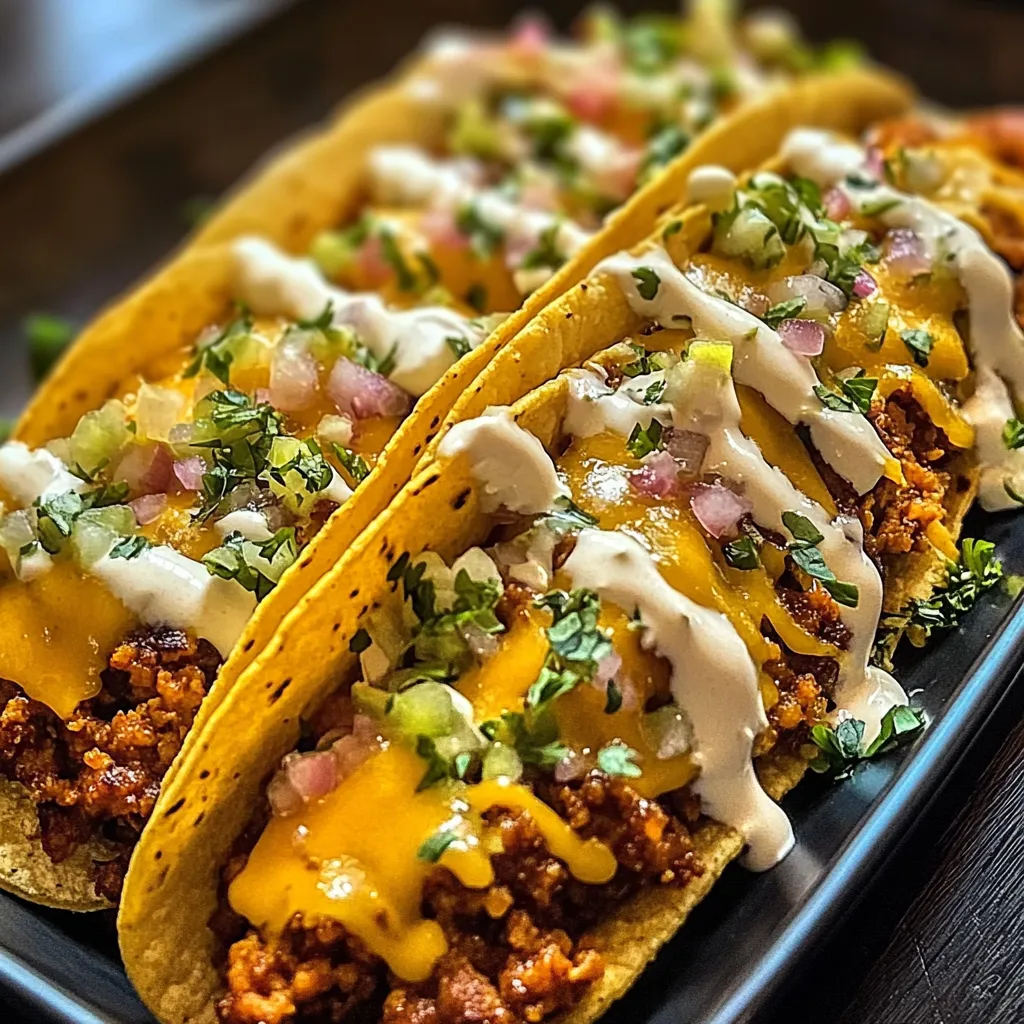
- Chedder Cheese: Shredded cheese is essential for achieving that gooey, melty texture once baked.
- Sour Cream: A dollop of sour cream adds creaminess and balances out the spices beautifully.
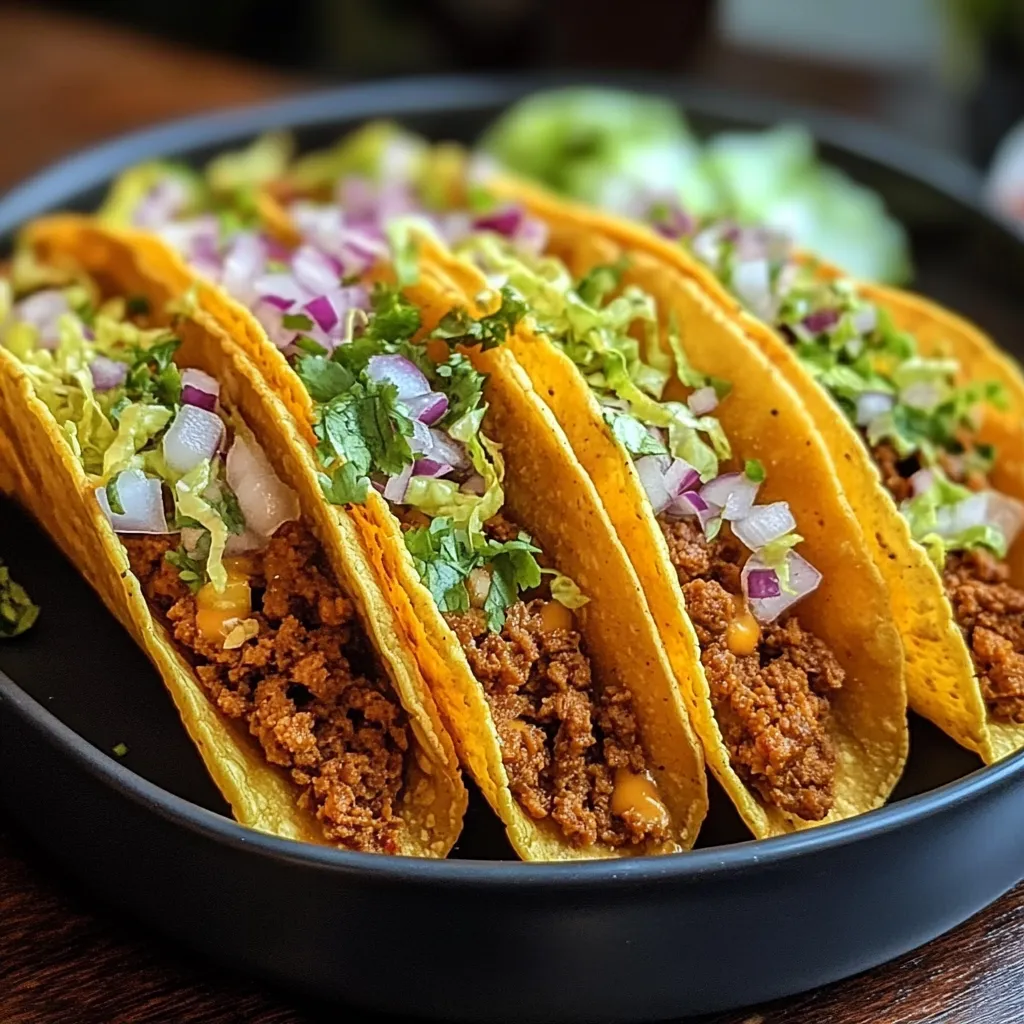
- Lettuce and Tomatoes: Fresh toppings provide a refreshing crunch and brightness to each bite.
Step-by-Step Instructions
- Preheat Your Oven: Start by preheating your oven to 375°F (190°C) so it’s hot and ready when your tacos go in.
- Prepare the Filling: In a skillet over medium heat, cook your ground beef or turkey until fully browned. Drain excess fat if necessary. Stir in taco seasoning along with water as directed on the package; let it simmer until thickened.
- Create Taco Shells: Arrange your taco shells upright in a baking dish. If they don’t stand well on their own, consider using crumpled aluminum foil to support them.
- Add Filling: Spoon the prepared meat mixture evenly into each taco shell until generously filled but not overflowing.
- Add Cheese: Top each filled shell with a generous amount of shredded cheddar cheese. Make sure every taco gets its share!
- Bake Your Tacos: Place the baking dish in the preheated oven and bake for about 15-20 minutes or until the cheese is melted and bubbly. Once done, remove from the oven and allow them to cool slightly before serving.
Expert Tips
- Select Quality Ingredients: Opt for high-quality cheese and fresh produce for optimal flavor enhancement.
- Add Spice: If you’re a fan of heat, consider mixing jalapeños into your filling or topping your tacos with spicy salsa before serving.
- Bake in Batches: If you’re preparing for a crowd, bake multiple trays at once if space permits! Just ensure even heat circulation by rotating trays halfway through cooking time.
- Taco Shell Alternatives: If you’re looking for gluten-free options, corn tortillas work wonderfully as substitutes without compromising on taste!
Presentation Ideas
The presentation can elevate your meal’s appeal significantly! Consider serving your oven-baked cheesy tacos on a vibrant platter garnished with fresh cilantro leaves. Accompany them with small bowls of toppings such as diced tomatoes, shredded lettuce, sliced jalapeños, guacamole, salsa verde, and sour cream so guests can build their perfect taco. For an extra festive touch, place lime wedges on the side for squeezing over each taco before enjoying!
FAQs
Can I make these tacos ahead of time?
You can certainly prepare the filling ahead of time! Cooked ground meat mixed with spices can be refrigerated for up to three days prior to assembly. When ready to serve, simply assemble the tacos as directed and bake them fresh out of the oven!
What can I use instead of meat?
If you’re looking for vegetarian options or simply want something different from meat fillings, consider black beans or lentils cooked with similar spices as substitutes. Additionally, roasted vegetables like bell peppers and zucchini add vibrant flavors while maintaining great texture!
How do I store leftovers?
Your leftover cheesy tacos can be stored in an airtight container in the refrigerator for up to three days. To reheat them while maintaining their crispiness, place them back in the oven at 350°F (175°C) until heated through rather than using microwave methods!
If I don’t have taco seasoning what can I use instead?
No worries! You can create a quick homemade seasoning blend using common spices like chili powder (1 tablespoon), cumin (1 teaspoon), garlic powder (1 teaspoon), onion powder (1 teaspoon), paprika (1 teaspoon), salt (to taste), and pepper (to taste). Mix together before adding it to your cooked meat mixture.
Crispy vs Soft Tacos – Which should I choose?
This choice ultimately depends on personal preference! Crispy tacos offer satisfying crunchiness while soft tortillas provide an easier folding option without breaking apart during assembly. Both variations work excellently with this recipe—feel free to experiment based on what suits your mood best!

Oven-Baked Cheesy Tacos
- Total Time: 35 minutes
- Yield: Serves 4 (3 tacos per serving) 1x
Description
Indulge in the ultimate comfort food with these oven-baked cheesy tacos, perfectly balanced with gooey cheese and crispy tortillas. This recipe is quick to prepare, making it ideal for weeknight dinners or gatherings. Customize the filling to suit your preferences, and enjoy delicious leftovers that maintain their crunch. Let’s get started on this flavorful journey!
Ingredients
- 12 taco shells (corn or flour)
- 1 lb ground beef or turkey
- 1 packet taco seasoning (about 1 oz)
- 1 cup water
- 2 cups shredded cheddar cheese
- ½ cup sour cream (for serving)
- 1 cup shredded lettuce (for topping)
- 1 cup diced tomatoes (for topping)
Instructions
- Preheat your oven to 375°F (190°C).
- In a skillet over medium heat, cook the ground beef or turkey until browned. Drain excess fat if necessary. Stir in taco seasoning and water; let simmer until thickened.
- Arrange taco shells upright in a baking dish, using crumpled aluminum foil for support if needed.
- Spoon the meat mixture evenly into each taco shell.
- Top each filled shell with shredded cheddar cheese.
- Bake for about 15-20 minutes, or until cheese is melted and bubbly. Allow to cool slightly before serving.
- Prep Time: 15 minutes
- Cook Time: 20 minutes
- Category: Main
- Method: Baking
- Cuisine: Mexican
Nutrition
- Serving Size: 1 taco (approximately 100g)
- Calories: 220
- Sugar: 2g
- Sodium: 450mg
- Fat: 12g
- Saturated Fat: 6g
- Unsaturated Fat: 4g
- Trans Fat: 0g
- Carbohydrates: 20g
- Fiber: 2g
- Protein: 10g
- Cholesterol: 40mg