Intro and Brief Recap
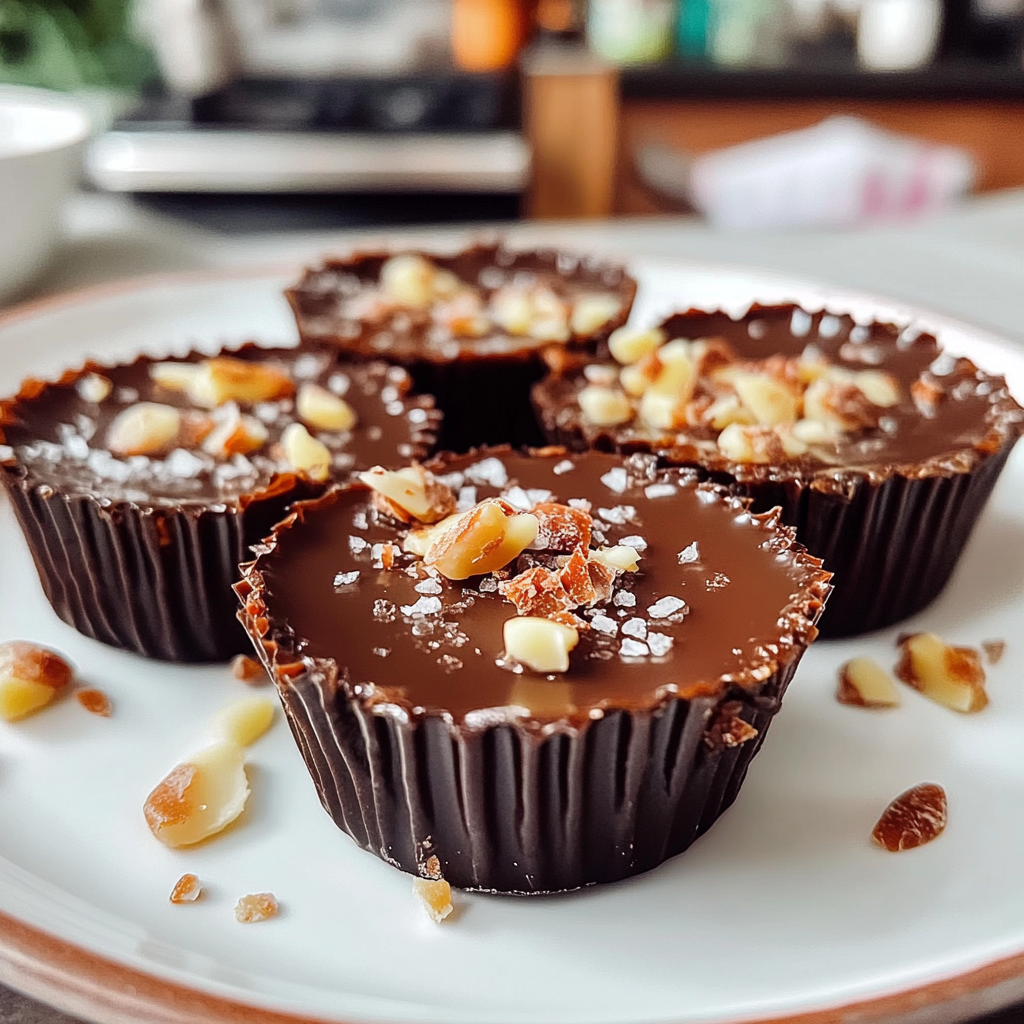
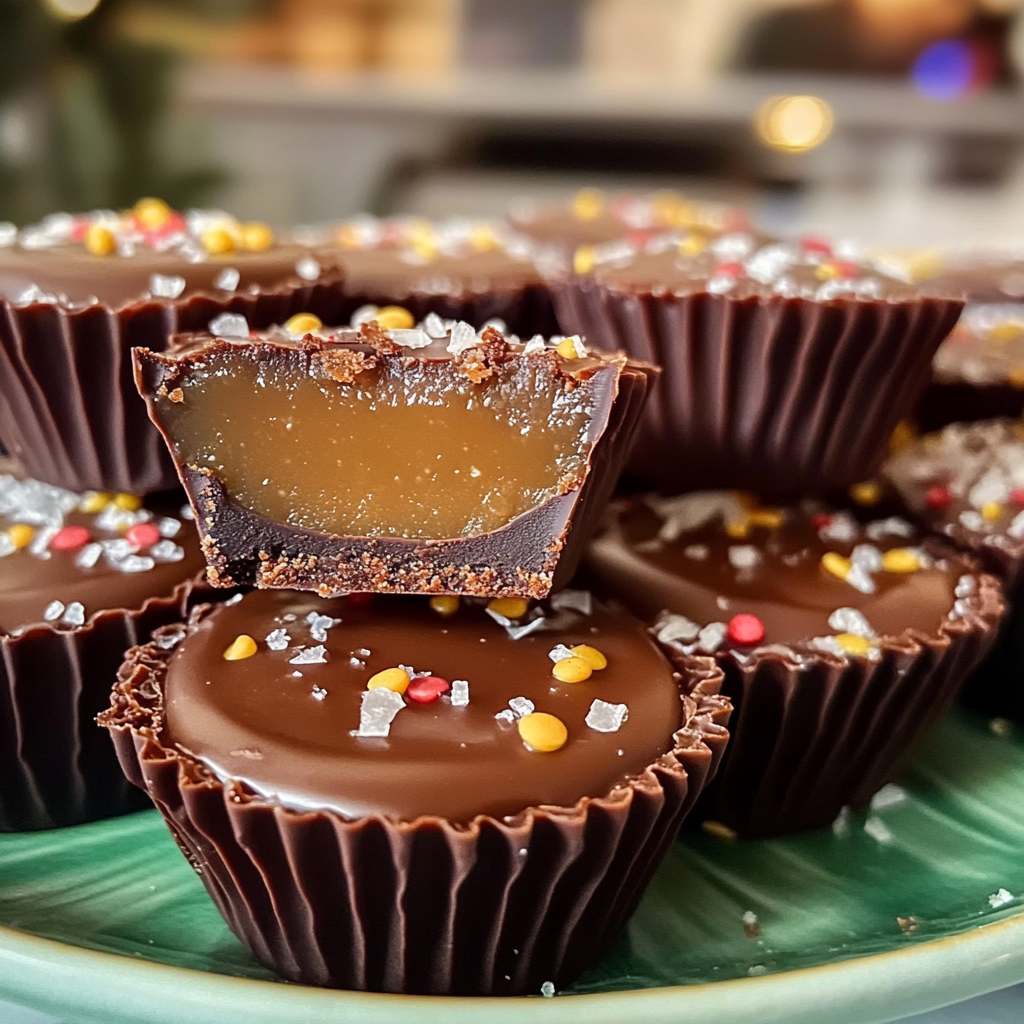
Are you ready to indulge in a sweet delight that perfectly encapsulates the festive spirit? Christmas Chocolate Caramel Cups are an irresistible treat that combines rich chocolate with luscious caramel, creating a flavor explosion with every bite. The moment you unwrap these little gems, the aroma of melted chocolate mingling with the sweet scent of caramel wafts through the air, tempting your taste buds like never before.
This delightful recipe is not only easy to make but also perfect for sharing during holiday gatherings or cozy family evenings. Picture yourself sitting by a warm fire, savoring these treats while laughter and joy fill the room. With their creamy texture and delightful crunch, these cups are bound to become a favorite holiday tradition in your home. Get ready to impress your friends and family with this mouthwatering dessert that promises to bring smiles all around.
Key Ingredients For Christmas Chocolate Caramel Cups
Here’s what you’ll need to make this delicious dish:
-
Chocolate Chips: Use semi-sweet chocolate chips for a balanced sweetness that complements the caramel.
-
Caramel Sauce: Choose high-quality caramel sauce for a smooth and rich flavor; homemade or store-bought works well.
-
Cupcake Liners: Opt for festive liners to make serving easy and add a holiday touch.
-
Sea Salt: A sprinkle of flaky sea salt enhances the flavors of chocolate and caramel beautifully.
-
Nuts (optional): Chopped nuts like pecans or walnuts can be added for extra crunch and flavor if desired.
The full ingredients list, including measurements, is provided in the recipe card directly below.
Instructions For Christmas Chocolate Caramel Cups
Follow these simple steps to prepare this delicious dish:
First Step: Prepare the Cupcake Liners
Line a muffin tin with festive cupcake liners. This will help create individual cups for the chocolate caramel treats.
Second Step: Melt the Chocolate
In a microwave-safe bowl, melt about two cups of chocolate chips in 30-second intervals, stirring after each round until smooth and fully melted.
Third Step: Fill the Liners
Spoon a layer of melted chocolate into each cupcake liner, ensuring it covers the bottom completely. Use a spoon or brush to spread it evenly along the sides if desired.
Fourth Step: Add Caramel
Once the chocolate has set slightly but is still soft, drizzle about one teaspoon of caramel sauce into each cup, allowing it to sit atop the chocolate layer.
Fifth Step: Top with More Chocolate
Cover each cup with another layer of melted chocolate, sealing in the caramel. Make sure there are no gaps where the caramel can escape.
Sixth Step: Chill
Place the muffin tin in the refrigerator for at least 30 minutes or until the chocolate has fully hardened. Once set, remove from liners and sprinkle lightly with sea salt.
Transfer to plates and enjoy your delightful Christmas Chocolate Caramel Cups as a festive treat!
Expert Tips
Here are some helpful tips to ensure the best results for your dish:
-
Use Quality Ingredients: High-quality chocolate and caramel will significantly enhance the flavor of your cups.
-
Don’t Rush Cooling: Allow enough time for chilling; this ensures that your cups hold their shape when served.
-
Add Flavor Variations: Experiment by adding peppermint extract or orange zest to change up the flavor profile.
-
Store Properly: Keep leftover cups in an airtight container at room temperature for up to one week.
Preparation Steps
To make the delightful Christmas Chocolate Caramel Cups, follow these simple steps:
Start by melting chocolate. Use a double boiler or microwave to gently melt your chocolate until it becomes smooth and creamy. Make sure not to overheat it, as this can ruin the texture.
Next, prepare your cups. Line your muffin tin with cupcake liners for easy removal later. Pour a small amount of melted chocolate into each liner, ensuring the bottom is covered evenly. Use a spoon to spread the chocolate up the sides of the liners, creating a cup shape.
Allow the chocolate to set. Place the muffin tin in the refrigerator for about 10-15 minutes, or until the chocolate hardens completely.
While waiting, prepare the caramel filling. You can use store-bought caramel or make your own using sugar, butter, and cream. If making homemade caramel, cook sugar until it melts and turns golden brown before adding butter and cream.
Once your caramel is ready, remove the muffin tin from the fridge and fill each chocolate cup with a generous dollop of caramel. Be careful not to overfill them!
Finally, top off each cup with more melted chocolate to seal in the caramel. Return the muffin tin to the fridge for another 15-20 minutes until everything sets completely.
Storage Tips
Proper storage ensures that your Christmas Chocolate Caramel Cups remain fresh and tasty:
Store them in an airtight container at room temperature if you plan to eat them within a week. This will keep them soft and chewy.
For longer storage, consider refrigerating them. Place your cups in an airtight container and store them in the fridge for up to two weeks.
If you want to keep them even longer, freeze your Christmas Chocolate Caramel Cups. Wrap each cup tightly in plastic wrap and place them in a freezer-safe bag or container. They can last for up to three months in the freezer.
When you’re ready to enjoy them again, simply thaw them at room temperature before serving. Avoid microwaving them directly from frozen as this can alter their texture.
Presentation Ideas
This Christmas Chocolate Caramel Cups is versatile and pairs wonderfully with:
-
Festive Platters: Arrange your cups on a decorative platter surrounded by seasonal fruits or nuts for an eye-catching display.
-
Gift Boxes: Package individual cups in clear bags tied with ribbon for thoughtful holiday gifts.
-
Holiday Dessert Table: Include these cups in a buffet-style dessert table alongside other festive treats like cookies and cakes.
FAQs
How do I make my own caramel for Christmas Chocolate Caramel Cups?
Making homemade caramel involves just three ingredients: sugar, butter, and heavy cream. Start by heating sugar over medium heat until it melts into a golden-brown syrup, stirring frequently. Once fully melted, carefully add butter and stir until combined. Then slowly pour in heavy cream while continuing to stir until smooth and creamy. Let it cool slightly before using it as filling for your Christmas Chocolate Caramel Cups.
Can I use different types of chocolate for these cups?
Absolutely! While dark chocolate adds richness, milk chocolate provides sweetness that balances well with caramel. You can even experiment with white chocolate or flavored chocolates like mint or orange for unique variations on your Christmas Chocolate Caramel Cups. Each type brings its distinct taste that can elevate your holiday treats.
How long do Christmas Chocolate Caramel Cups last?
When stored properly in an airtight container at room temperature, these delightful treats typically last about one week. If refrigerated, they can remain fresh for up to two weeks. For longer preservation, freezing is an excellent option; they can last up to three months when wrapped securely and kept in a freezer-safe bag.
Can I customize my Christmas Chocolate Caramel Cups?
Yes! Adding toppings like crushed nuts, sprinkles, or sea salt enhances both flavor and presentation of your Christmas Chocolate Caramel Cups. You might also incorporate flavored extracts such as vanilla or peppermint into your chocolate mix or caramel filling for added depth of flavor tailored to suit any holiday gathering!
Christmas Chocolate Caramel Cups
- Total Time: 25 minutes
- Yield: Makes approximately 12 cups 1x
Description
Indulge in the festive spirit with these Christmas Chocolate Caramel Cups, a delightful combination of creamy chocolate and luscious caramel that melts in your mouth. Perfect for holiday gatherings or cozy nights by the fire, these irresistible treats are easy to make and sure to impress family and friends. With their rich flavors and charming presentation, they are destined to become a beloved holiday tradition.
Ingredients
- 2 cups semi-sweet chocolate chips
- 1 cup caramel sauce (homemade or store-bought)
- 12 festive cupcake liners
- 1 tsp flaky sea salt (for topping)
- ½ cup chopped nuts (optional)
Instructions
- Line a muffin tin with cupcake liners.
- Melt the chocolate chips in a microwave-safe bowl in 30-second intervals, stirring until smooth.
- Spoon melted chocolate into each liner, covering the bottom completely. Use a spoon to spread it up the sides if desired.
- Drizzle approximately one teaspoon of caramel sauce into each cup once the chocolate has set slightly.
- Cover with another layer of melted chocolate to seal in the caramel.
- Chill in the refrigerator for at least 30 minutes until set. Once hardened, remove from liners and sprinkle lightly with sea salt.
- Prep Time: 15 minutes
- Cook Time: 10 minutes
- Category: Dessert
- Method: Chilling
- Cuisine: American
Nutrition
- Serving Size: 1 cup (30g)
- Calories: 150
- Sugar: 14g
- Sodium: 15mg
- Fat: 9g
- Saturated Fat: 5g
- Unsaturated Fat: 3g
- Trans Fat: 0g
- Carbohydrates: 16g
- Fiber: 1g
- Protein: 2g
- Cholesterol: 5mg